Showing posts with label craft. Show all posts

Tuesday, October 2, 2012

Am I the Only One?

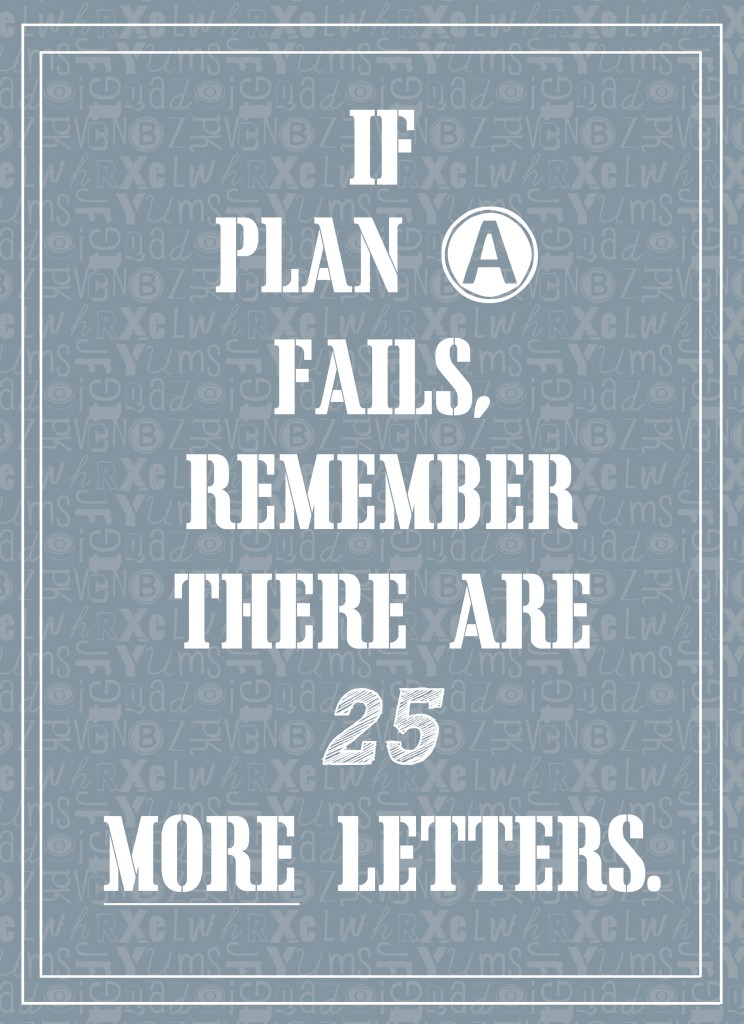
Am I the only one that notices a cute quote on the internet and automatically connects it to my life? I sure hope not. With the right script and color combination a cute print can make its way into my life very easily.  Here are a few examples of clever and cute prints that have made their way into my heart (and somehow have applied to my life):

Source
You're right poster! There ARE 25 more letters. I'll keep trying!
Source
Abe Lincoln? Well if he said it... it HAS to be good advice. 

Source
Holy smokes. Why didn't I think of that? I love my birthday... why not act like everyday is my day?

In addition to connecting every uplifting and motivational print on the internet to my life....I have a slightly terrible habit of hanging onto everything. Well, let me rephrase that: I have a slightly terrible habit of hanging onto everything that has sentimental value. Ask me for a pair of socks and I can't help you. Ask me for a ticket stub from the MU/KU football game - I'm your gal. 

Thanks to little site named Pinterest (I'm sure you've never heard of it), I found a way to preserve those extra special momentos. All I needed was: 1 shadow box, 1 uplifting quote (optional of course), and special thingy-mabobs that hold a place in your little heart. From my posters above, I'm sure you can assume that it took me awhile to narrow down a print that REALLY stole the show. I spent more time finding my uplifting quote than I did making the craft.

Fancy, eh?


Now... Go! Embrace this current season!

Wednesday, July 11, 2012

Umm, What's a Zig Zag Pattern?

Let me first begin by reinforcing the statement that I am not a seamstress. Trust me! I have many sewing classes and obstacles to cross before I ever earn that title. My grandmothers are seamstresses. I am a beginner. Actually, what do you call someone who continues to begin over and over again?

I know I have a long way to go in my sewing because I can never remember how to thread that darn bobbin! The agony!! I had to watch clips from this video... waaaay too many times. I actually started speaking in a British accent afterwards to make myself feel better. Later, I had to turn on the video again to learn how to install a new needle after mine tragically broke. Let's just say, I learned a lot yesterday. I practically have the video memorized.


The other night, I was laying on the floor next to my bed chatting on the phone. As I was using the floor as a couch I noticed a tan tote bag under my bed. This tote that was hiding under my bed came from an Accelerated Reader conference I attended back in October. I snagged the bag and decided to give more poor like AR bag a facelift considering I wasn't going to use it in its current state. 

On U-Create, I found a ton of tote bag tutorials here. I scrolled through and found the one I wanted to try and I got started. It was time to give this AR bag a little life!

I cut two strips of a canvas print and two strips of burlap. Then, I followed the directions given here! That's when I encountered my first problem where I asked... "Umm.. what is a zig zag pattern?" Oddly enough, my sewing guru had just called and she briefed me, "It's where your needle jumps around and makes a zig zag stitch." Ahh, Alissa knows how to speak to me in terms I understand. 

Get Ready For a Makeover, Bag!
I began sewing my strips along the edges and attempting the "ruffling" of the strips. Things were going along just swimmingly until I asked my next question, "Umm.. what's a jean needle?"

Obviously, I didn't have one of those. My poor regular needle (is that what we call them?) sacrificed his life for this tote. Don't worry, only one needle was injured during this project.

While I was sewing away, my friend Ashley was cricuting away and we were simultaneously watching Craft Wars on TLC. It was a crafting overload.  In my head I began to think, "I should have Ashley take me picture!" I stood up to go grab my camera and I stepped on a pile of fabric and completely wiped out. We laughed nonstop for about three minutes. I'm glad someone else was there to witness my epic fall. After I dried my laughter-tears, I loaded up my sewing machine and Ashley caught a few pics. I feel so bloggylicious.

Action!
 After the zig zag pattern, the broken needle, and my wipe out I finally finished my bag. For the average person, this craft will probably take you one hour TOPS. For me, I like to take things nice and slow.


Now, I plan on carrying this bag everywhere with me in hopes that someone will ask, "Oh! Where did you get your bag?" Then I can reply smugly and say, "I made it." :)

Thursday, March 8, 2012

Two Truths

This week I've realized two obvious truths about myself: I'm addicted to wreaths and I'm a borderline hoarder. Let me explain. 

I had this great idea to use each night this week to clean out a different room in my house. First, I wanted to start with my kitchen, then move to my room.. blah blah you get the idea. Well, as I was tackling my closet I was picking and choosing what to keep and donate to Goodwill.  I found myself clinging to everything. My poor friend Emily had to listen to me on the phone while I was talking myself in and out of keeping things. After realizing that it's just a t-shirt and not the ticket and/or experience from which I bought the shirt... I started chucking clothes in trash bags like it was nobody's business. Take that hoarding! Just when I thought I was making serious progress, I still had crap (pardon me) everywhere that I just couldn't part with. Don't get me wrong, I'm making quite the donation to Goodwill, but there's a lot more work to do.

 I dare you to come over to my house when I'm 80. Actually, I triple dog dare you because I'm probably going to need help cleaning out my crib.

Now, my second obvious truth. I love wreaths. Since spring is popping up around the corner, I did what any logical wreath addict would do... I made another one. (This also adds to my hoarding issues). I used a basic natural wreath from JoAnn's and hot glued a few fabric rosettes on top. Now, my front door is welcoming spring and the occasional postal worker who comes-a-knockin'. 

Here's a great tutorial for rosettes! Click here


The hot glue really glistens in the sun, doesn't it?


Happy It'sAlmostFridayAndICan'tContainMyExcitment Thursday!

Thursday, February 23, 2012

A Wreath For Your Thursday!

Bless you, Craftaholics Anonymous, bless you. Not only did you come to my rescue and save my naked burlap wreath, but you are the queen of quick and simple seasonal wreaths. Your gift is appreciated here!

I pinned this little gem a few weeks ago and thought it was the perfect solution to my poor pitiful wreath. Let me back up, about a month ago I attempted a craft night. Instead, I had a great evening catching up with a friend and all I managed to do was wrap a straw wreath in burlap. Now you're up to speed on my naked wreath.

Back to business! My new favorite blog, Craftaholic's, gives a great description on how to make very simple flowers from felt, buttons, clips, and glue. See for yourself!

Here's what I used:

  • 1 naked burlap wreath
  • felt
  • buttons
  • clips (I'm sure there is a more scientific name for them)
  • hot glue


Originally, I wanted to make my very own St. Patty's Day wreath but as usual I ran into a few obstacles. This time the obstacle was the color green. Yes, that green button is shining visibly in the picture above - but did I notice that last night? Of course not. I was extremely convinced that I did not own any green buttons or fabric of any kind.

Naturally, I moved onto Plan B. What colors are never out of season? Black and gold, baby!


Does anyone watch "The New Girl"? This week's episode was precious and about a situation in Jess' classroom. Check it out!

Sunday, November 20, 2011

I Get By With a Little Help From My Friends

I love Thanksgiving for multiple reasons. One of those reasons is Friendsgiving! A delightful tradition that started over five years ago in a college apartment. Needless to say, the 5th Annual Friendsgiving was just as incredible! 

My contribution to the party was a little potato dish. I was introduced to the "Party Potato" phenomenon a few years ago when a fellow teacher brought in her family recipe to class one day. Since then, I've been having parties with potatoes like it's nobodys business.

Now, trust me with this recipe and go make your own Party Potatoes!

What You Need
1/2 cup melted butter
1/4 cup chopped onion
1/2 cup shredded cheese
1 cup sour cream
1 can cream of mushroom soup
2 lbs. Ore-Ida frozen cubed hash browns


Mix first 5 items together with salt and pepper, combine with frozen potatoes, put in greased 9x13 pan. Top with 2 cups of corn flakes and 1/3 cup melted butter together.Bake at 350°F for 1 hour.


Now, a family gathering isn't complete without a family photo. Before our delicious feast, we gathered by the fire for a group shot. All we're missing his Clark Griswold. 
Family Portrait by the Fire
It also wouldn't be a family gathering without a little arts and crafts time. I rallied the troops back to the table for a pinterest-inspired yummy craft. I had ulterior motives when planning this activity. My 5th graders will be creating this little turkeys on Monday and I did need to practice... but I also wanted to make the treat for fun as well. Uhh... You're welcome! 


We were good students and followed the directions below. You could say that we had a unique bunch of turkeys. 

I found this How-To on Examiner. Warning: this isn't as easy as it looks!

What You Need:

Oreo cookies
Candy corn
Miniature Reese’s Peanut Butter Cup
Icing
Candy eyes
Directions:

  1. Separate the Oreo into two pieces (you may want to use a knife to make sure the cookies stay in tact).
  2. Add icing to the Oreo’s cookie icing and arrange five pieces of candy corn around the top of the Oreo that contains the most icing creating “feathers” and two across the bottom to create “feet” with white tip facing down.  (Note: strategically place feet to prop and hold up the Oreo turkey.  It may take you a few times to get the exact placing.)
  3. Re-close Oreo cookie using icing more icing to attach it if necessary.   
  4. Using icing, attach the Reese’s Peanut Butter Cup with the widest part flat against the bottom of the face of the Oreo. 
The icing was the best part. Right, Scott?

Admit it, you love arts and crafts time. 
Now, back to my favorite Atlanta housewives for some high-quality drama on a Sunday night. Enjoy the short week, teachers!


Sunday, July 3, 2011

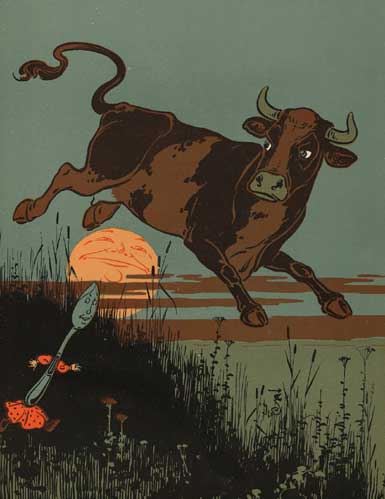
...and the dish ran away with the spoon!


Hey diddle diddle,
The Cat and the fiddle,
The Cow jumped over the moon,
The little Dog laughed to see such sport,
And the Dish ran away with the Spoon.

I'm sure you all remember this classic nursery rhyme. It seemed fitting since my project today consisted of silverware!

The other day I set out searching for another hanging project for my kitchen. Lucky for me, I found the website Crap I've Made. Of course at first, I was intrigued by the title. Then, after some searching I found Kitchen Art complete with a Dollar Store challenge! The best part about this craft is that it's CHEAP!


Pick up a cheap frame and a few pieces of silverware from your local dollar store and you're ready to roll.

Of course, I'll use any excuse to scoot over to JoAnn's for some new fabric. I picked up a few pieces (on sale) and checked out with my teacher discount and headed home.


Today was a milestone in my summer of crafting... I made a list of materials needed. Therefore, I didn't have to stop midway through my craft and go buy something. I feel like I'm growing up.

Since I'm going with an "apple" color theme in my kitchen, I decided to use yellow spray paint to compliment the linen curtains I bought at Bed Bath & Beyond.

This was a bad idea.

I used my brain and thought it was probably a bad idea to spray paint all over the grass of my apartment complex. Instead, I used a trash bag. Big mistake! My poor silverware and frame stuck to the bag and it was a sticky mess to pick up.

Using the tips from the tutorial I found, I put my frame together with batting and fabric. Before I knew it, I had a nifty project to display in my kitchen.

Pass the sugar, please!
Next stop: Wally World to buy food for the family BBQ tomorrow. Although, a storm is rolling through Columbia right about now, perhaps I'll wait a few.

It better stop raining! Doesn't Mother Nature know it's America's birthday weekend?

Happy 4th of July! :)

Saturday, June 18, 2011

Yarn Wrapping is Not for Beginners

Get ready for an explosion of crafting... your eyes might pop out! 

Just kidding.

I spent the afternoon with Alissa crafting up goodies in KC. Let's just say, we got a little frustrated throughout our experience. I'm getting ahead of myself.. let's back up to the beginning.

To start our journey we took a trip to the oh-so-wonderful Hobby Lobby. We managed to find an rustic/antique like frame for the yarn letter project, and a replica of this Vintage Wood Calendar Chalkboard I wanted to purchase from Urban Outfitters. (it was out of stock!)

After Hobby Lobby we headed to Michaels because I had a coupon for 20% my entire purchase! Have I mentioned I'm not very good with coupons? Well, I'm not. In fact, I have a 10% success rate using them. Today made me feel foolish because after I asked about using my teacher discount at the checkout (feeling confident) the woman said, "Your coupon isn't valid until Sunday, m'am."

It appears I cannot read the fine print. Oops! 0/1 on coupons for the day. I was saved by my 15% teacher discount (who cannot read fine print...) That was slightly embarrassing.  Almost as embarrassing as sending an email to 60+ people confusing "too" for "two" in a sentence. Summer vacation has done wonders on me!

Moving right along to craft numero uno. I found the cutest dish towel at Anthropologie while shopping at the Plaza. I decided to display it instead of using it for its intended purpose (being a towel, duh). We found a neat frame and wrapped the towel around the glass so the embroidered knife, fork, and spoon were on display in the golden frame.


Meet Alissa: the hand model 

Here is Finnegan and our finished product! Cute, eh? I think it will look delightful hanging in my kitchen. 

Using inspiration from a craft that Ashley Fine created in her living room, I wanted to try out this so called chalkboard paint people keep raving about. I bought a cheap plastic rim frame and took the cardboard backing out. Then, using my nifty can of chalkboard paint that Alissa found in Michael's...I started spraying. 

"IT'S JUST LIKE SPRAY PAINT!" -my reaction to the paint
"It is spray paint!" -Alissa reassuring me as I painted (good thing I have her around)


The little can there did the trick! Hours later... I am still fascinated. 


After it dried for a few hours, I added a few embellishments to make it fancy. Now, when you come to visit me you can sign your name on my chalkboard and write a little message! It was by far the easiest project of the day.

I've saved the best (and most dreadful) for last. After reading Let Birds Fly blog post on Yarn Wrapped Letters, I was convinced this was the best craft for me. It didn't require any sewing, needles, or manual labor from what the pictures showed. I was hooked! I even left the link open on my desktop for days to build excitement. Maybe I should have kept that little tidbit to myself, but oh well... it's public knowledge now.


Using Let Birds Fly photo and tutorial as a reference, Alissa and I began our journey. We had the frame picked out and I decided on the word "Happy" for these reasons:
1. I like to be happy.
2. I would like for others to be happy.
3. If you're happy and you know it clap your hands.
4. Don't worry be happy.
5. My middle name is Happy (okay I lied, it's Jennifer... but it's close!)

Yarn, letters, and Ben Harper Pandora radio station ready to rolllll

Unfortunately we were not HAPPY while making this project. We started with the individual letters and began wrapping away. The curves, turns, holes, and nonsense of the letters that I chose began to become our crafting Achilles heel. It would have been much easier if we had used block letters. Lesson learned!

Throughout our wrapping experience the following noises were heard by Ali Pitt on the telephone...


"AHHHHHHHHHH"
"STOP IT."
"I'm getting frustrated." -Alissa
"Keep calm and sew on..." -My attempt at humor
"NOOOOO!"


I think you get the idea. It was frustrating! Thankfully, Ben Harper crooning in the background added to our uncomfortable silence due to the wrapping. I started with the letter H and next tackled an A. I realized afterwards that my project was slightly mocking me. As if to say, "HA" you are not done yet, sucker! I can't take credit for the Y... that was all Alissa, although I think that's a memory she will soon forget.


After multiple burns from the glue gun (we cheated) and screeches of frustration, we were able to complete a pretty nifty project! All I ask is that when you come over and see this hanging on my wall you shout with pure joy and enthusiasm by saying, "WOW! I AM SO HAPPY!"

That's all for now. I need to come up with a neat "closing" as we called it in second grade. I'll test out a few before I pick the one for me.

Over and out!
(nahh...)
Add This

LinkWithin

Related Posts Plugin for WordPress, Blogger...