Showing posts with label canvas. Show all posts

Thursday, June 28, 2012

A Whole Pot of Coffee Does the Crafter Good

You're probably wondering - why is this crazy lady posting twice in one night? Well, I have a slight confession to make. Remember that wonderful neighbor of mine that taught me how to sew? Now, I'm using her computer. Be grateful you don't live near me because I'm appearing to be very needy.

Let's back up. On Tuesday, I informed my faithful followers that I became an aunt again. In the excitement of being home and swooning in my new aunty-hood (again), I left my computer there. It was a sad realization when I unzipped my overnight bag yesterday morning. After searching for useless apps to update through my iPad - I walked next door. Don't worry, I ate a piece of their cheesecake too.

Currently, I rent the house I live in. It's a lovely little spot... full of white walls. I wanted to add a little color and excitement to my bedroom so I tackled that idea today. Before tackling the idea, I had to get out of bed first.

I crawled out of bed to the disturbing news that Ann Curry is leaving the Today Show.  Yikes- don't get me started. It took me long enough to get over the fact that Meredith was leaving. Anywho, I made myself a pot of coffee and after drinking the entire thing (oops), I had started roughly four different craft projects. Clearly coffee is this crafters gasoline.


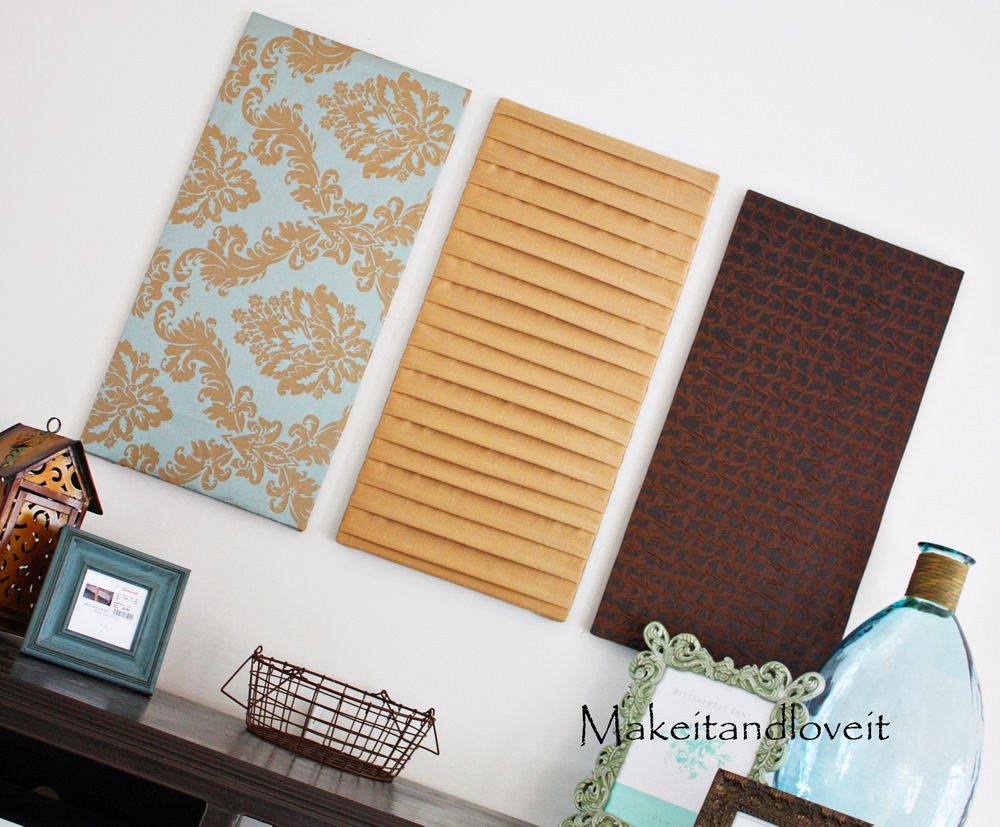
Do you enjoy Instagram as much as I do? Thanks to my new favorite blog, A Beautiful Mess, I was introduced to Postal Pix. Postal Pix is a delightful little app that prints out YOUR instagram photos and sends them right to you via snail mail. I took the advice of Elsie, and I order 9 4x4 prints to fit snuggly on my 12x12 canvas.

I arranged my favorite photos and modge podged them like crazy.  While the canvas was drying, I moved onto another blank canvas and began covering it with tape.  My plan was to create a striped pattern on two blank canvases to hang them over my dresser.


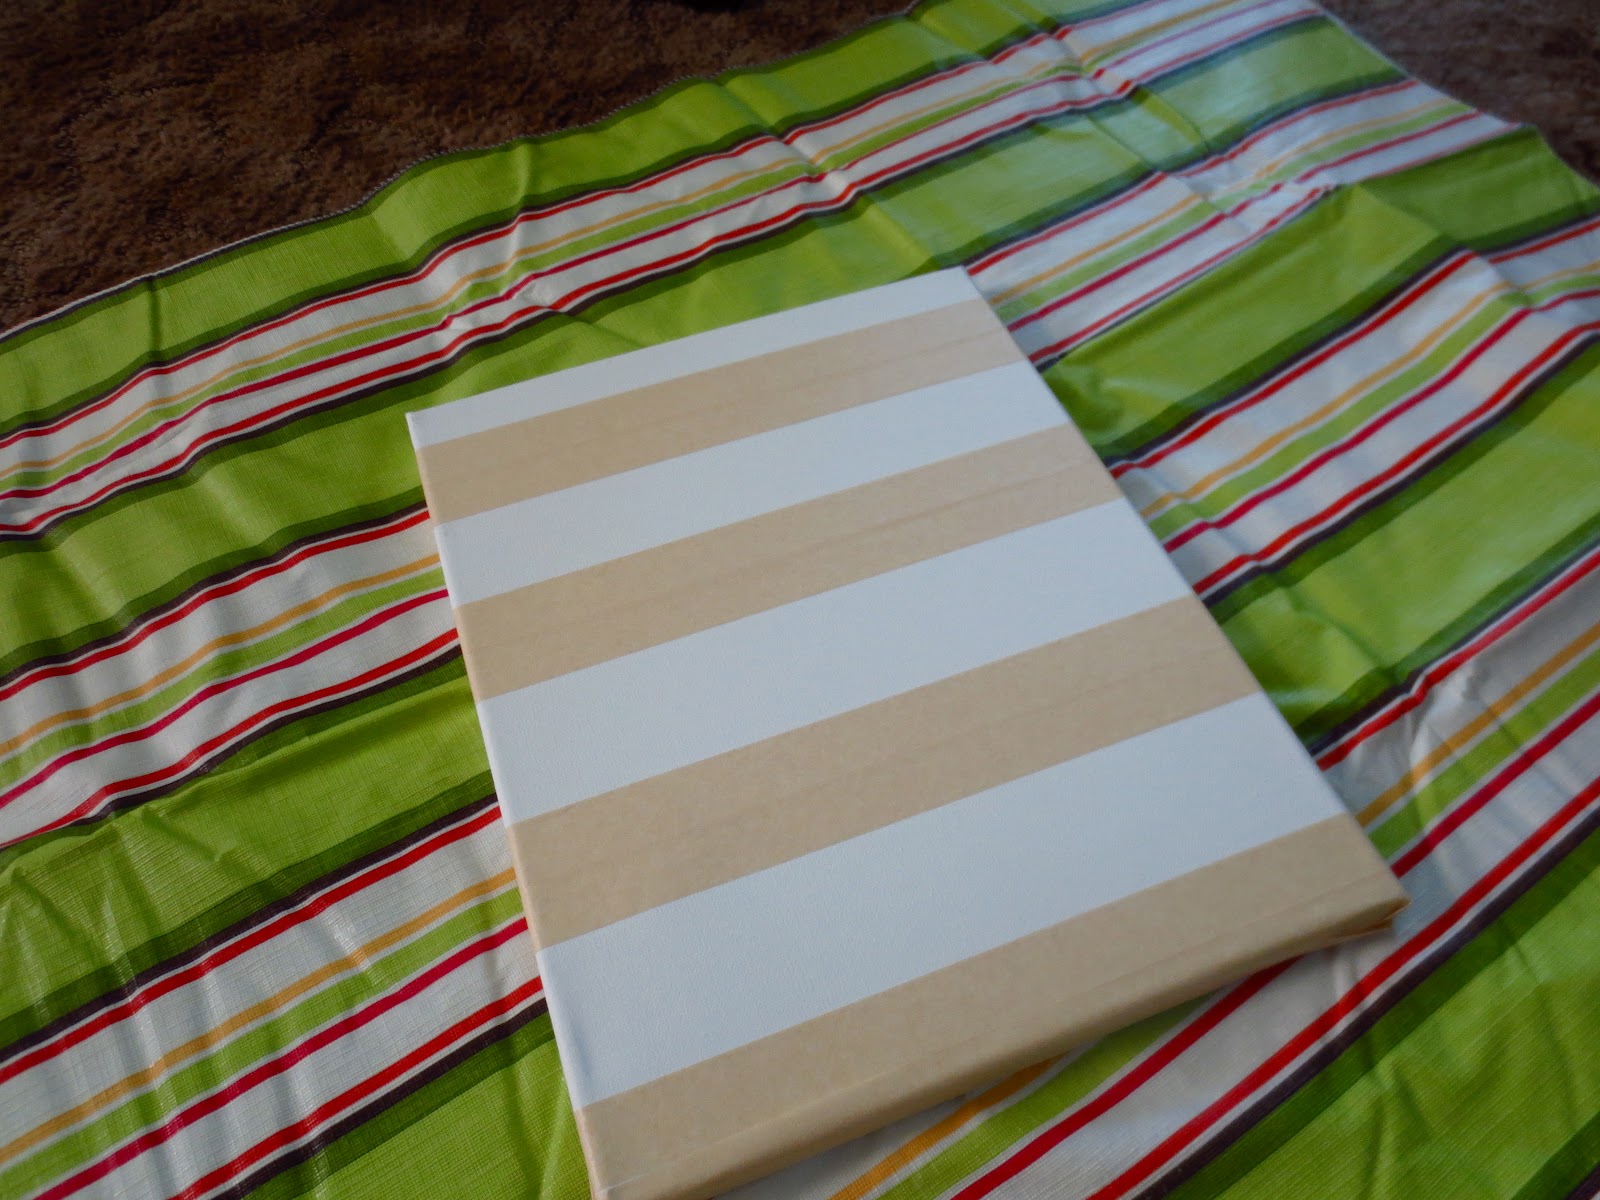
After what felt like an eternity (that's the coffee talking) I peeled away the tape. I was surprised to find a pretty cute design! I was quite pleased with my color and pattern.

See Ya Later White Walls


I added a couple of prints that have been sitting out around my house to the wall and snapped a few photos.  I still feel like the wall needs something, but my jitters got the best of me and I couldn't quite figure it out. My brain quickly switched off and went on to the next crafting adventure for the day.  I'll give you a hint - it involved chalkboard paint and it failed. I was bound to hit a road block eventually!

Somewhat Simple

Tuesday, July 19, 2011

Oh! The Life of a Renter


It's official! I'm a resident of Lake Ozark, Missouri. After 5 fantastic years in Columbia, I've taken a leap and moved away. I figure if two of my friends can move to Texas and California... I can manage the lake!


Since I'm renting my new house, painting isn't really an option. Nor was I ready to take on such a task. Even though I can't paint, I still want to bring color into my living room! My pillows can only do so much.

Speaking of pillows... Here are a few of my favorites that I have found lately:

DIY Ruffled Rosette Flower
Missouri Pillow, Etsy

DIY Pillows from Sweaters, Pinterest

Etsy

Recycled Felt, Etsy

White Linen, Etsy
Oops! Got a little distracted. I do love pillows. If you've ever been to mi casa you will find pillows everywhere: on the couch, chair, bed, and floor. Pillows are the perfect addition to any room!

Back to my post.  I wanted to add color to my living room without painting. I found an excellent idea on Make It-Love It's blog to hang fabric. What an excellent idea! 


I picked up a few pieces of fabric at JoAnn's that matched my living room. The tutorial suggests using plywood, staple gun, and other supplies I didn't have.

Since I didn't have (nor want to buy) the necessary supplies, I was stumped as to how to complete this project. Then! A lightbulb lit above my head.

While walking around Michael's craft store, I found myself in the paint section. I found two large white  paint canvases. I will admit, they were more expensive than the plywood approach...but they were much easier for me to handle!

I measured the fabric to fit the canvas like a snug blanket. Then, I started cutting and gluing away!


Lastly, I hung the newly wrapped canvases on the wall using 3M heavy duty frame strips. I stepped back and took a few photos.


An hour later, I was sitting on my couch and they fell on the ground. I jumped so high I thought I was going to land in my bedroom. Luckily, no one was trying to break in... I had only overestimated the capabilities of 3M products.

I put my thinking cap on and used nails.

Then, I ate a cookie. Really.. I did! My landlord made me cookies.

P.S. I joined a Linky Party! Check it out here: Tater Tots and Jello

Sunday, June 26, 2011

Sunny Sonntag

My vacuum has seen better days. I thought I might give some life to it by changing the belt. One might think that this would be an easy process. FYI: it's not. I bought three different Eureka belts at Wal-Mart and let them sit on the counter for 24 hours. Today, using my tools and the instrucional guide... I tried changing the belt. After what I thought was a successful process, I began to vacuum.


Oops!

My poor vacuum started smoking violently. I shut it off and ran away from it. I couldn't run far because my apartment is small. Instead, I hid it in my kitchen. Hopefully the vacuum fairy shows up quickly to repair my smokey vacuum.

It's craft time. I'm excited about this one, because it was remarkably easy and fun! I was able to successfully watch Beverly Hills 90210 on SoapNet and make flowers from fabric.

This year, I bought a significant amount of fabric to decorate my bulletin boards. Fabric lasts longer than butcher paper, so it may cost more but it's worth it.

I found the perfect tutorial on The Secret Stitch Club's blog. I was super pumped because it didn't require a needle and thread or sewing machine! First, I decided to make a gift for two friends who shall remain nameless at this time. I bought cheap frames at Target to decorate. I gathered my fabric, glue gun, frames, and fancy buttons and starting crafting!


I discovered that the flowers are much better when you cut thicker strips of fabric. Also, the thicker the fabric the better! The online tutorial takes you through each step in making the flowers:

1. Tie a knot at the end of the strip and glue to surface.
2. Twist fabric and glue
3. Repeat!

My flowers at first were quite small but then I figured out the secret to success. 

Up close and personal 

The perfect gift!
Next, I decided to put that one last canvas to good use. I made three more flowers and glued them to the white canvas for wall art. I'm not sure where it will go on my wall, but it's great to have options!


As you can see, I made a boo-boo on the finished product. I originally had a smaller yellow flower, but it didn't quite mesh so I peeled it off. Once I find some, I'm going to add some tulle to hide the sticky glue mess. I highly recommend this craft! It was pretty simple and fun!

That's all folks! 


Add This

LinkWithin

Related Posts Plugin for WordPress, Blogger...