Showing posts with label apples. Show all posts

Wednesday, July 9, 2014

Our FIRST Iron Chef!

Last night, we got together with a group of friends and participated in our first Iron Chef competition! Prior to the evening, we all suggested secret ingredients and they were tossed into a hat. Then the youngest member of the group (i.e. a 1-year old) picked the ingredient and assigned each couple a "course" to prepare. 

The secret ingredient was.....


APPLES!

Scott and I were responsible for coming up with a main dish using apple as its star player. Our wheels were spinning all weekend. Finally, we decided to make ribs with some sort of apple glaze to drizzle over the top. 

Before tossing the soon to be applely-tasting ribs in the oven, I used Twisted Belly All Purpose Rub to coat the ribs for extra flavor. I may be biased, but Twisted Belly is my favorite rub - the only one I ever use. :) Even Chip is a big fan of the product!

#GetTwisted
Next, after consulting my fellow chef, my ribs cooked at 300 degrees in a pan of apple cider for about two hours. Oh, I added a few apples on top of the ribs for kicks. After two hours of cooking, I scorched my fingers and flipped the ribs over to cook for another two hours. 


While the ribs were cooking, I prepared the an apple glaze to add an extra apple-punch to the ribs. 

Apple Glaze adapted from Food & Wine Magazine
You'll Need:
  • 2 cups apple cider
  • 1/2 C Apple Jelly
  • 1/2 C Maple Syrup
  • 1/4 C Spicy Brown Mustard
  • 1/2 t All Spice
  • Pinch of Ginger
  • 1 T Corn Starch
Make It!
  • Bring the apple cider to a boil and let it reduce by half. Add the jelly and syrup to the reduced cider. Next, add in the mustard and spices. Add in cornstarch to thicken the glaze. 

Once the glaze was ready, Scott coated the ribs and stuck them back in the oven for a few more minutes. After a while, we turned on the broiler as well. 


To top off the ribs, we diced one apple and sprinkled the apple bits over the ribs as a garnish with the glaze. 

I don't mean to brag - okay, I will brag - but the ribs were amazing. 
Ah-maze-ing. 


We each gave scores for the other dishes in the competition and rated them on Taste, Plating, and Originality. 

The results were tallied... calculated.... recounted.... analyzed... and

WE WON! Not only did we win bragging rights, but we get to take home a pretty stellar traveling trophy with a fork on top! 


Victory!


Now, it's time to spruce up the trophy and start planning our next Iron Chef dish!

Sunday, June 30, 2013

Desserts & Dateline

 One afternoon I was chatting with a friend of mine who teaches preschool. She told me about the perfect little dessert that her kids made with crescent rolls, apples, cinnamon, and sugar.  Could it be? Am I the only one who didn't make this dessert as a wee little one? Sheesh. Well I'm making up for lost time now. 

I bought a package of four crescent rolls and one Granny Smith apple. After sprinkling the inside of the crescent roll with cinnamon and sugar, I added the apple (which I forgot to peel) and caramel bits. Next I rolled the crescents up and stuffed a few more caramel bits in for good measure. 

I popped the dumplings in the oven for 13 minutes at 375 degrees. 


It was yummy, easy, and very quick.  

The perfect dessert for two people wrapped up in the drama of Dateline on a Friday night. 


Tuesday, August 9, 2011

"Breakfast"

I wanted to think of a fancy title for this breakfast series. Here are a few I came up with:

"Let's Find Jordon Something FILLING to Eat So She Doesn't Have to Eat McDonalds Everyday"

"Let's Find Something Really Great for Jordon to Eat For Breakfast That is QUICK and EASY"

I stopped after that and realized titling things is not in my job description. I decided to make this one easy by naming it, "Breakfast".

It all started with this image that popped into my life via Pinterest. Naturally I was drawn to it because:
a. It's food
b. It's multiple photos of food

Need I say more?


Keep Your Diet Real posted 20 quick ideas for breakfast. GENIUS! Wahoo! YIPPIE! Just what I was looking for. This week, I have been making a conscious effort to make delicious breakfast before life gets too crazy.

To begin, I closed my eyes and pointed at a random photo. When my finger landed on no where near the photo I decided to pick number five first. Now my friends, meet contestant number fiiiiiiiiiiiive: (cue applause)

Keep Your Diet Real photo

Peanut Butter Yogurt Dip

Ingredients

  • 4 oz honey flavored Greek yogurt
  • 1 tsp. vanilla extract
  • 1.5 Tablespoon honey
  • 2 tablespoons of peanut butter
  • 2 oz Reduced fat cream cheese, softened

Directions

  1. Place all ingredients in a food processor and blend until smooth.
  2. Chill in the refrigerator for 15+ minutes or serve immediately. Store in the refrigerator.
  3. Serving suggestion: 2 tablespoons of dip with ½ cup fresh fruit or sliced apples.

Oh LAWDY! This dip was amazing. Literally, as I continued with each bite of my apple I thought I was going to end up licking my ziplock container. Don't worry, I'm not an animal! I resisted temptation. 

The best part was, it filled me up! My stomach wasn't tossing and turning at 9:00 AM. I actually made it until lunch (very important for teachers!!)

For Tuesday, I decided to jump on the smoothie bandwagon. If you can't tell, I kind of enjoy jumping on bandwagons. 

To be honest, I wanted to jump on this bandwagon a few months ago. Sadly, it didn't work out that way. One morning while searching my kitchen for something yummy to eat I decided, "ah-ha! I'll make a smoothie!" I gathered some ingredients and started to look for my blender. Then I realized I didn't have a blender. 

Needless to say, it's extremely difficult to blend things without a blender. A few months later, I invested in a blender so I could really jump on this bandwagon.

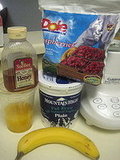
I borrowed a delicious smoothie recipe from Yum Sugar and started blending.

The Basic Classic Smoothie
From Michael SweeneyThe Basic Classic Smoothie
Ingredients
6 frozen strawberries*
3/4 cup plain, low-fat yogurt (feel free to substitute a flavored yogurt for plain: strawberry and blueberry work well)
1 banana
1/2 cup orange juice
1 tablespoon of honey
protein powder or flax, optional
Directions
  1. Place the frozen strawberries in the blender. Let sit for 10-15 minutes, so they have time to thaw.
  2. Add the remaining ingredients and blend. Check consistency: if too watery, add more yogurt. If too thick, add more orange juice.
  3. Pour into a glass and enjoy!
Makes 1 smoothie.
I grabbed my smoothie from the fridge this morning and had several smoothie fouls. It leaked on my desk, purse, and inside my car. It was probably on my face all day, too.

I think for the time being I'm hopping off this smoothie band wagon.

Add This

LinkWithin

Related Posts Plugin for WordPress, Blogger...