Showing posts with label christmas. Show all posts

Saturday, December 12, 2015

Shutter + Christmas Cards

A little shutter made its way into our Christmas decor this year! 


This faithful little shutter sat un-painted and hidden for the past two years because I couldn't figure out what to do with it.  I even moved it into our new house hoping inspiration would strike one day. A can of red spray paint and glitter blast brought this bland shutter to life. Now it's home to Christmas cards from family and friends. 


We have the perfect spot for the shutter(s) on our landing. I was so excited to keep cards on display showing off cute pictures of family and friends.

Shutter number one is filling up! It's almost time to bust out the second shutter.


Happy Holidays!

Saturday, December 21, 2013

Bringing DIY to my Classroom


To say that our classroom was filled with Christmas cheer this week would be a mild understatement. For one of our activities, I had my students create an ornament with their big 'ol 5th grade smile tucked inside for their families. Last year, I made a few ornaments for my own tree that you can read about here. It was fun bringing the spirit of DIY to my classroom and equally exciting having my students create a gift for a family member - now I'm just hoping that gift made it home and found its way to a tree. :)

For the project, we used a ball-shaped ornament, and a photograph to roll up and stick inside. The end result was pretty stinkin' cute. 


Stuffing the Ornaments
What holiday crafts did you complete with your students?

Happy weekend! 

Sunday, December 23, 2012

In Whoville They Say...

WARNING: After the consumption of these tasty Grinch Cookies, your heart will definitely grow three sizes and you'll be overcome with the true meaning of Christmas. Side effects may include speaking in rhyme, changing your last name to Who, and possibly eating a roast BEAST.

You can't say I didn't warn you. 


Grinch Crinkle Cookies

You'll Need:

1 18.25oz box French vanilla cake mix
6 T butter
2 eggs
Green food coloring (I used 60 drops)
1 C powdered sugar
1 t corn starch

Now click here to follow the Cowgirl's procedure for baking these little gems. 
I hope everyone's holiday has gotten off to a great start. Squeeze your families and keep them close. I know I will!

Tuesday, December 4, 2012

DIY Ornament or Two...

This year I decided to add a personal touch to my Christmas tree. To make my tree a little merrier and brighter, I felt it needed a DIY touch. Plus, I love things that are sentimental and mushy. Which means... I had a blast making them. To make the ornaments, I used glass ornaments purchased at Michaels.   


Picture/Photograph Ornament

Using the glass ornaments purchased from Michaels and some photos I snagged from an album, I made two ornaments of fond 2012 memories. One for me and one for my bf! Along with the photograph, I stuck some crinkled white, red, and green paper inside the ornament. That was much easier than adjusting the photo. This idea came from Life of a Thrifter's blog here. She gives more detailed instruction than I will. Basically, you roll up the photograph and use tweezers to adjust the photo instead. Along with the tweezers, you're going to need high levels of patience and skinny fingers for when things go wrong. Let's just say, this took a couple of tries. I had to take a break because my frustration levels were getting high. 


For the second ornament, I destroyed (literally) a few pages from my Mizzou Alumni magazine. I took pieces of the magazine with great photographs and words and cut them into strips. Then I rolled the strips around a pencil and stuffed the curled paper in the ornament behind a photograph. I also cut up a few football tickets to add to the ornament. 

Scrappy Mod Podge Ornament

I grabbed my final glass ornament and scraps of fabric and started mod podging! There was no rhyme or reason to my layering, I just went for it. The end result turned out bright, lumpy, greenish, and kind of wonky. Just my style!


Of all of the ornaments on the tree, I think that this one is my favorite. I'm sure you can see why!


Happy Tuesday!


Monday, November 19, 2012

Glitter Blast!

In continuation with my "It's not you Thanksgiving, it's me" series, I bring to you another Christmas craft. Sunday was a whirlwind of DIY-mania. Hopefully, this post may bring a little peace and joy to your evening!

At Michaels I bought white wooden block letters and gave them a little make over. I spray painted each one a metallic gold and glitter blasted them with paint. I wish I had coined the term, "Glitter Blast", but the spray paint company beat me to it. I plan on incorporating it into my vocabulary more often. 

 It's a puzzle. Can you figure out what the word is supposed to be? I'm glad I painted the letters in the wrong order and then took the picture. 


I glitter-blasted (according to the spray can) my letters to give them a little sparkle. I love the way they shimmer and shine in the sunlight! Practically Edward Cullen in letter form. 


I stuck the letters on a wreath and added a few pine cones and berry garland to give it that classy Christmas feel. The letters are little wonky on the wreath, but that's my middle name. Wonky. Jordon Wonky F. Nothing is ever straight or in perfect order... every thing I do has a little wonky touch. The more I say "wonky" out loud the weirder it sounds. 


Peace on Earth and goodwill to men.

Glitter-Blasted
In addition to my "peace" letters, I also bought larger white block letters at Michaels. I painted them metallic gold with a glitter blast as well. They are happily propped up against my lamp next to a photo that brings me joy. 


That's all folks! 

Sunday, November 18, 2012

A Chalkboard Christmas

First, I must apoligize to Thanksgiving. Mentally, I have already moved onto Christmas. My house, too, has already moved onto the winter holidays. It's not you, Thanksgiving, it's me. 

This two day work week mentality has my crafting juices flowing. My grades were exported on Friday (hip hip hooray), so I'm ready to enjoy this week with all of the people that I love the most! One of my many projects this afternoon were chalkboard creations. I purchased these little wooden cut outs at Michaels today and gave them a new look. 


Several hours later, I gave each one a cute little holiday quote. It seemed appropriate to write something about chilly weather on the snowflake. If you're getting technical, it's really not cold outside. Actually, it's quite wonderful outside right now. But, we're not technical here. 


For the bell, I picked a quote from my favorite Christmas book, "How the Grinch Stole Christmas". Because you know, in Who-ville they say the Grinch's small heart grew THREE SIZES that day!


Lastly, I gave an old poster a new look with, yes... you guessed it! chalkboard paint. Now, proudly hanging in my living room is a quote from one of my favorite movies, Elf.  Buddy the Elf provides a lot of my motivational quotes around the holidays. He's a wise 'ol elf!


 Happy Sunday!

Sunday, December 11, 2011

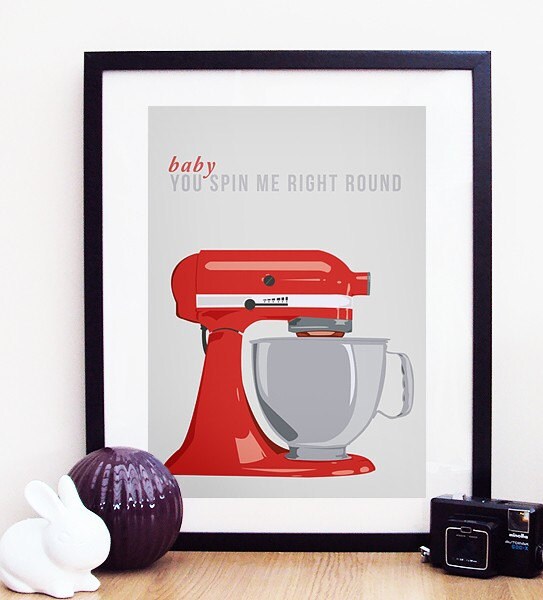
You Spin Me Right 'Round

One thing that I've never been able to do is make sugar cookie cut into cut little Christmas shapes. No matter how hard I try to roll out the dough and cut neat little designs... it just doesn't work out in my favor. I will leave the sugar cookie cuttin' to my sister. She's practically a pro and I can always look forward to her delicious cookies at Christmas time.

Despite my inability to make cute little cookies that look like angels and reindeer, I've been determined to find Christmas cookies I CAN make. I like to call that persistance with a dash of procrastination (I wasn't exactly ready for the weekend to end).

As always, I found a blog to save the day! Baked Perfection posted her spin on Hershey's classic Candy Cane Blossoms. While chatting on the phone with my friend Ginger, we decided to bake together from miles away. She oh-so-rudely moved to Orlando and out of my driving zone. Sheesh! I still love her anyway!

Baked Perfection


Candy Cane Blossoms
recipe from Hershey's

1 bag Hershey's Kisses brand Candy Cane Kisses
1/2 cup butter, softened
1 cup granulated sugar
1 1/2 teaspoons vanilla extract
1 egg
2 cups all purpose flour
1/4 teaspoon salt
1/4 teaspoon baking soda
2 tablespoons milk
Red and Green colored sugar

Preheat over to 350 degrees Fahrenheit. Remove wrappers from candies (approx. 35)

Beat butter, sugar, vanilla, and egg in large bowl until well blended. Stir together flour, baking soda and salt; add alternatively with milk to butter mixture, beating until well blended.

Shape dough into 1 inch balls. Roll in red and/or green colored sugar. Place on ungreased cookie sheet.

Bake 8 - 1o minutes or until edges are lightly browned and cookies is set. Remove from oven; cool 2 to 3 minutes. Press candy piece into center of each cookie. Remove from cookie sheet to wire rack. Cool completely. Yields approximately 35 cookies.

My KitchenAid and I seriously had a moment (or two...or three) during this cookie making experience. If you are a reader, you may recall the day I got my KitchenAid. It was a glorious and happy day! Since work/school/life has been so hectic lately, my 'aid has been put on the back burner. Not tonight! We made a mess and had a splendid evening. Ahhh.. Feels good to have her back. 

Etsy

Friday, November 25, 2011

InstaFriday!


What am I doing on Black Friday? Oh, just relaxing in my pajamas and catching up on a few of my favorite TV shows. Life is grand!


life rearranged

What's better than swinging outside on Thanksgiving? (In Missouri I must add...) Not much! This cute little face is one of the many things I'm thankful for. 


Traditions are the best part of the holidays. Christmas lights and fireworks are one my favorites! 


I jumped the Christmas gun a tad too soon, but I couldn't help it. It's beginning to look a lot like Christmas at the lake. 


Visit Life Rearranged and link up your InstaFriday submissions. 

Happy shopping, friends!

Wednesday, November 23, 2011

Christmas Copy Cat

Two posts in one day? I'm on a roll. Or... it could be argued that I should get off my butt and do something else? Nah. I'm enjoying this completely.

Wreaths are quickly becoming my "thing". Mainly because, it doesn't require any sewing whatsoever. We all know (or maybe you know) that sewing is my Achilles' heel. Anytime I see a project with sewing, I quickly close the page so I don't get too attached to the project awaiting.

I've been pinning Christmas wreaths since the beginning of my Pinterest experience, and I've been dying to make one. Here are a few of my favorites I've pinned:

JoAnn's
Etsy: Katie Jo Collection
Real Simple
Vintage Indie
Etsy: ItzFitz
I decided to tackle Itz Fitz's white wreath with poinsettias. It seemed easy enough for a Tuesday night. 
I picked up a few bouquets of 94 cent bouquets and Wal-Mart with cream yarn and started crafting. 


Let me tell you, it takes awhile to wrap a wreath. Sure, it's one of the easiest things to do... but darn! It's time consuming. Lucky for me, I had a few conversations on Skype and the telephone to pass the time. So my warning: set aside some QT (quality time) for wrapping your wreath. 

Welcome!
After the wrapping shenanigans ended, it took me about 3.5 minutes to hot glue fake flowers on the wreath. Bada-Bing.. Bada-Boom! I was done. In the near future, I'll embark on another wreath adventure (maybe). 

Now, it wouldn't be a proper post without ending my rambling with a random comment. Well, in case you're unaware.. my beloved Missouri Tigers will be facing the (dirty) kU jayhawks this weekend. Will I be there to cheer on the Tigers? You bet I will!


My advice: Friends don't let friends move to Lawrence, Kansas.

Love & Marriage


Christy Robbins

Say "I" if you've seen this ornament floating around Pinterest... I!

When, I pinned this a few months ago I knew that I had to make something similar for my newlywed friends. In October, my sweet friends Emily and Kyle said, "I do" in beautiful Key West, Florida. Then, in November they held the par-tay of the century (also commonly known as a reception) back in Columbia for family and friends (like me! Although, I would argue that I would like to join the family as well).

Now, it's late November and the Christmas holiday is approaching and it's the PERFECT season to create ornaments. Plus, I have five days off of school.

Christy Robbins has an excellent step by step guide to making an ornament of your very own. I had full intentions of finding a clear ornament and making a duplicate of the one above. Until Wal-Mart had other plans for the Newlands. Which means, they didn't sell any clear ornaments....

Yikes - Ignore the price! How tacky of me. 

I used the following supplies:
Ornaments
Wedding Invite
Scissors
Pen (or pencil to roll invite)

I cut the invitation (sorry guys...) into tiny strips and then rolled each strip around the pen. Again, click here to see photos of the step by step process. Then, I stuffed each strip inside the ornament. Luckily for me (and Wal-Mart) the ornament I picked matched their invite and wedding colors.

Merry & Bright
Then, I got so excited to show the happy couple their gift I demanded that they drop everything and FaceTime with me. I knew my blog would be published before I saw them next. Don't worry.. they liked it!

Unrelated, doesn't it look like this reindeer is ready to party? I thought so too.

Here For the Party!
Gobble Gobble!

Add This

LinkWithin

Related Posts Plugin for WordPress, Blogger...