Explore the Chronicles

Thursday, December 29, 2011

Breakfast with Martha!


Friday, December 23, 2011

Insta-Friday!

life rearranged

I'm laying in bed on a beautiful Friday morning at 10:15 AM which means it's... Christmas break and I can  link up with Insta-Friday!

What is one of the best parts about being home? Yes, it's spending time with my favorite nephew. Adorable, right?


Showing off our talents with Mr. Potato Head's hats on our heads. 


Cue the song: "I Feel Home" by OAR 

Happy holidays everyone!

Thursday, December 22, 2011

Meeting Scientists

In college, I read an article for my science class about bringing scientists TO your classroom for an authentic learning experience. While reading it, I thought.. hmm? How on earth could I do that?

As a second grade teacher, my team brought in a crew of soil scientists to talk to our kiddos about soil and it was great! The kids (and teachers) liked it so much, we did it again the next year!

I wanted to bring this type of experience to my kiddos at Osage, so I started asking! Thanks to a good friend, I was introduced to Mr. Zach Paul. He's a meteorologist for KRCG News in Columbia, Missouri.  During our weather unit this fall, Zach graciously visited my classroom for an entire day and talked with my kiddos about the weather. They were so excited! Not only were they excited to have a REAL LIVE TV STAR in the classroom, but they were so intrigued by his line of work as well.

Filling our brains with weather knowledge!
Zach talked to us about all things weather his daily life. It worked out perfectly, because my kiddos had been studying clouds, the water cycle, and all that jazz so they could ask great questions. We even taught Zach our water cycle song!
Let's chat about the weather, Zach!

As you may (or may not) know, my class just finished its oh-so-wonderful unit on the solar system. Hands down, space is the most fun to teach! In a few posts, I mentioned how I was dying to take my kids on a field trip to space but the funds weren't available. (ha ha.. funny, I know).

Then, a wonderfully surprising thing happened! I received an email that Barbara from The Corner on Character had commented on my blog. She always leaves the most uplifting comments, so naturally I was excited to read it. Then, I had to read her comment again... and again...and again. Her comment offered a skype session with her husband who works for NASA!

Through Barbara's outreach, my students were able to Skype with her husband who works for the Johnson Space Center in Texas. Prior to our skyping session, I spoke with my principal, technology, and my team to make appropriate arrangements. The next thing I knew it was Monday morning and I was skyping with John and Barbara in Texas with 60+ students in my room!


First, we brainstormed a list of questions to ask John. I reminded the students SEVERAL times to ask thoughtful and meaningful questions. Besides, its not everyday that you get to speak with someone from NASA!

Hi John!
John talked with us about current missions, the planets, and a little insight on his work with NASA. Once again, my kids were enthralled and had millions of questions. Thanks to the power of technology, generous people (cough Barbara!), and this blog ... my kiddos got to experience something really great.

That's all folks!

Tuesday, December 13, 2011

Scrumptious x2 Tuesday

Lucky Post #100!

Brace yourself! I've got two deliciously easy treats for you to try. Which are conveniently two of my favorite characteristics of baking: delicious and easy. More emphasis on the delicious of course.

Side note: I'm rocking the clothing version of a mullet right now. I'm partially dressed in sweat pants and my dress and pearls from school today. I'm ready for business on top and slumber on the bottom. Which reminds me of this:

Musings
Back on track.. Once again brace yourself.


Apple Dumplings (with a splash of 'Dew!)


Warning: These have not been baked, YET!
Where did I find this recipe you ask? Well, Pinterest of course. Can I think of anything on my own anymore or simply crack open a cook book? Ha! That's nonsense. Or so she says... is a great blog full of great recipes. Check it out!


Apple Dumplings
from The Pioneer Woman

2 sticks butter
1 tsp. vanilla
1 1/2 cups sugar
2 tubes crescent rolls
2 granny smith apples
12 ounces of Mountain Dew
Cinnamon
Vanilla ice cream

Directions: 
  • Peel and slice your apples.  (I skipped this step)
  • Wrap each slice in a crescent dough triangle and place in sprayed (greased) pan.  
  • In a bowl, melt your butter and stir in sugar and vanilla.  
  • Pour over top of the wrapped apples....or spread on top with a spoon.  
  • Pour the Mt. Dew all around and sprinkle with Cinnamon. 
  • Place in 350 degree oven for 30 to 40 minutes.  
  • Serve hot with ice cream!
I've never baked with Mountain Dew (or any pop for that matter), so my hand was a tad shaky pouring the dew all over my beautifully wrapped apples (of course, I'm exaggerating. They weren't beautiful). The final product was delish. I've got a few leftovers in my fridge.. head on over!

She Says Photo

I'm a lover of all things Funfetti. Ever since my BFF Ali (click here for her blog!) discovered the magical recipe of Funfetti cookies. I've even blogged about a Funfetti adventure here and here. See? I'm borderline obsessed. So, anytime I see something Funfetti related on Pinterest it's an automatic repin. Introducing recipe numero dos:

Funfetti Cake Batter Fudge from Pursuit of Happiness (I'm a new follower!)


1 14 ounce can sweetened condensed milk

3.5 cups white chocolate chips

3 tsp Vanilla Extract

1/2 tsp Almond Extract
Rainbow Sprinkles
Pour milk and white chocolate into a microwave-safe bowl. Heat for 2-3 minutes, or until white chocolate is almost completely melted. DO NOT OVERHEAT. Stir until completely blended, melted, and smooth.
Immediately add vanilla and almond and combine thoroughly. Add a handful or so of rainbow sprinkles and fold in quickly, because they will melt (and if they are stirred for too long they’ll turn the fudge an ugly muddy color)
Transfer to an aluminum-foil lined 8×8 inch baking pan for very thick fudge, or a 11X7 pan (recommended). Let set at room temperature or in the refrigerator.
MIZ Fudge Style
I think I went a little crazy with the almond flavoring, but overall my fudge was/is pretty delish. I'll be sure to let you know what my book club thinks of it tonight.
Before I go, I'm sure you've seen the adorable photo of snowman door decor floating around Pinterest and bloggy land. I decided to bring a little snow into my classroom before the holidays! Hopefully it doesn't bring a blizzard like last year. Oops!
Thumpity Thump Thump
Linking up here!

Sunday, December 11, 2011

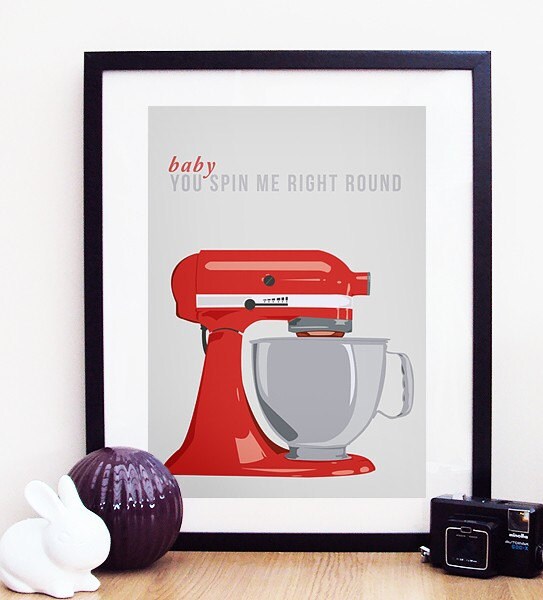
You Spin Me Right 'Round

One thing that I've never been able to do is make sugar cookie cut into cut little Christmas shapes. No matter how hard I try to roll out the dough and cut neat little designs... it just doesn't work out in my favor. I will leave the sugar cookie cuttin' to my sister. She's practically a pro and I can always look forward to her delicious cookies at Christmas time.

Despite my inability to make cute little cookies that look like angels and reindeer, I've been determined to find Christmas cookies I CAN make. I like to call that persistance with a dash of procrastination (I wasn't exactly ready for the weekend to end).

As always, I found a blog to save the day! Baked Perfection posted her spin on Hershey's classic Candy Cane Blossoms. While chatting on the phone with my friend Ginger, we decided to bake together from miles away. She oh-so-rudely moved to Orlando and out of my driving zone. Sheesh! I still love her anyway!

Baked Perfection


Candy Cane Blossoms
recipe from Hershey's

1 bag Hershey's Kisses brand Candy Cane Kisses
1/2 cup butter, softened
1 cup granulated sugar
1 1/2 teaspoons vanilla extract
1 egg
2 cups all purpose flour
1/4 teaspoon salt
1/4 teaspoon baking soda
2 tablespoons milk
Red and Green colored sugar

Preheat over to 350 degrees Fahrenheit. Remove wrappers from candies (approx. 35)

Beat butter, sugar, vanilla, and egg in large bowl until well blended. Stir together flour, baking soda and salt; add alternatively with milk to butter mixture, beating until well blended.

Shape dough into 1 inch balls. Roll in red and/or green colored sugar. Place on ungreased cookie sheet.

Bake 8 - 1o minutes or until edges are lightly browned and cookies is set. Remove from oven; cool 2 to 3 minutes. Press candy piece into center of each cookie. Remove from cookie sheet to wire rack. Cool completely. Yields approximately 35 cookies.

My KitchenAid and I seriously had a moment (or two...or three) during this cookie making experience. If you are a reader, you may recall the day I got my KitchenAid. It was a glorious and happy day! Since work/school/life has been so hectic lately, my 'aid has been put on the back burner. Not tonight! We made a mess and had a splendid evening. Ahhh.. Feels good to have her back. 

Etsy

Pasta For 2

I spent my Saturday evening cooking up a deliciously great dish with someone equally as great. Now, I've got plenty of leftovers and Netflix can stream on my Wii. (No, the pasta did not have an affect on my Wii)

Spaghetti with Tomatoes, Black Olives, Garlic, and Feta Cheese
Food & Wine


Ingredients:

  • 1 1/2 pounds tomatoes (about 3) seeded and cut into 1/2-inch pieces
  • 1/2 cup black olives
  • 1/4 pound feta cheese, crumbled
  • 3 tablespoons drained capers 
  • 3 tablespoons chopped flat-leaf parsley
  • 1/4 teaspoon salt
  • 1/4 teaspoon fresh-ground black pepper
  • 3/4 pound spaghetti
  • 6 tablespoons olive oil
  • 3 cloves garlic, minced


  1. In a large glass or stainless-steel bowl, combine the tomatoes, olives, feta, capers, parsley, salt, and pepper.
  2. In a large pot of boiling, salted water, cook the spaghetti until just done, about 12 minutes. Drain.
  3. Meanwhile, in a medium frying pan, heat the olive oil over moderately low heat. Add the garlic and cook, stirring, for 1 minute. Add the cooked pasta and the garlic oil to the tomato mixture and toss.

    I double dog dare you to try it. You won't regret it!

    Etsy

    Remember for your Tuesday.. it's best to be silly, be honest, and be kind! 

    Over the Moon!

    We're all about outer space in room 52. The planets, comets, meteors, the Moon, and everything else in between have absolutely positively taken over.

    If I could, I would have packed up the kiddos and taken a first class field trip to outer space ... but my budget couldn't cover that trip this month. Maybe next year? Here are a few things we've done to make up for not being able to visit the planets. (A girl can dream, right?)

    I spotted this photo on Pinterest and tracked down the source to Beakers and Bumble Bees. From there, I began searching for how to make this work in our hallway. Then! I found Astro Society (click the link!) and it had a beautifully converted toilet paper chart. It lists approximate values for laying out planets and their distances from the Sun. This was a great visual for how far the planets really are from one another!


    The students were amazed when we were counting toilet paper down the hallway. Plus, we generated some curiosity from other classrooms.

    Can you see the asteroid belt?
    Last week, we went a little crazy chatting about the Moon and its phases. Now, if you know me... you would know that I will use any excuse to sing and dance. Naturally, when I found a few songs on the Moon Phases I KNEW I had to bring them to my classroom. 

    This little number by Mr. Parr uses the tune from "Forget You" by Cee Lo Green. To say that my students love it is an understatement. I've listened to this song easily 20 times in the past week. I've had kiddos looking it up at home, too! Have a listen!

    I see you hangin' all around in the sky above...


    Here's a rap to tap your foot along to:


    Here's one more sung by some kiddos. 


    Memorizing these phases can be daunting, but I decided to trick my students into learning them with oreos. Who wouldn't want to learn and eat at the same time? My 8:00 science class was PUMPED about eating oreos first thing in the morning. As I handed out four oreos to each students I heard one little one say, "My dad doesn't even let me have this many at home!"

    Educational & Delicious

    Before munching down their delicious phases, each student had to name each phase in order. See? A sneaky little trick don't you think?

    In other news... sorry 'bout your bad luck, Pluto.


    Monday, December 5, 2011

    That's a FACT!

    How many days until Christmas break? Not that I'm counting down or anything...

    Anyway! The past week or so, we have been focusing on Fact and Opinion. I wanted to find a super-duper-fantastic idea that would leave my kiddos begging for fact and opinion daily, but I came up short. Many google and pinterest searches came up inconclusive. So! I racked my brain and came up with an idea of my own. Shocker! I didn't know I was capable of this anymore.

    I'm a big big BIG fan of anchor charts. I don't know what it is, but I love rallying the troops around the carpet and charting information on a piece of chart paper together. Maybe it's the second grade teacher in me. Anyway, I love it. My original plan was to create an anchor chart for fact and opinion, create our own definitions and write examples... blah blah.  (I say "blah blah" like its a bad thing, but I still highly enjoy that idea!)

    I decided to give the anchor chart a little face lift. Paging Dr. Paul Nassif (RHOBH, anyone?)!

    Using a bulletin board, I created a giant T-Chart with border and my cricut. One side labeled, "Fact" and the other "Opinion".


    First, we ironed our own definitions of fact and opinion and wrote those on chart paper. Then, using sentence strips I modeled writing down an example of an opinion. My opinion statement was, "I believe the Grinch is the best Christmas movie, ever!" We discussed why this was my opinion and it couldn't be proven true. Then, I handed the sentence strips over to the kiddos and let them write! They were chomping at the bit to write down examples of facts and opinions. We were writing, stapling, writing examples, and stapling some more. It was super interactive and high energy in my classroom for the entire lesson!

    Yes, 3x3=9

    Eh, Football is okay!
    Overall, it was a pretty fun lesson and now we have our stellar bulletin board to refer to. Anyone have any other great ideas for fact and opinion? Send them my way!

    Have you seen my friend Ashley's delightful blog One Fine Day? If you haven't, you should head over because she's hosting her first giveaway! She's a talented blogger and if you aren't following her, you must start NOW!

    Smitten & Swell

    Simple Things

    It may not be Simple Things Sunday, but it's Simple Things Monday over here in my world. This is one of my favorite linky parties to join.

    I spent the weekend with my dad and sister in beautiful (and busy!) New York City.  It was great spending quality time with my family. Who could ask for anything more?

    A beautifully lit Christmas tree in the middle of the hustle and bustle of NYC. Simple pleasures of life!


    Entertaining myself with a cooke next to the Empire State Building. So simple!


    Check out Simple as That for more delightful simple pleasures.


    Wednesday, November 30, 2011

    Hugs

    After missing two days of school this week because of a little bronchitis bug, it was great to be back with my kiddos again today. I was greeted with warm smiles, high-fives, cards, candy, hugs, and even a can of soup!

    It's true what they say...

    Mr. Hug Art Print

    Short, sweet, and to the point. Now, turn on NBC and watch the Rockefellar Christmas concert!

    Friday, November 25, 2011

    InstaFriday!


    What am I doing on Black Friday? Oh, just relaxing in my pajamas and catching up on a few of my favorite TV shows. Life is grand!


    life rearranged

    What's better than swinging outside on Thanksgiving? (In Missouri I must add...) Not much! This cute little face is one of the many things I'm thankful for. 


    Traditions are the best part of the holidays. Christmas lights and fireworks are one my favorites! 


    I jumped the Christmas gun a tad too soon, but I couldn't help it. It's beginning to look a lot like Christmas at the lake. 


    Visit Life Rearranged and link up your InstaFriday submissions. 

    Happy shopping, friends!

    Wednesday, November 23, 2011

    Christmas Copy Cat

    Two posts in one day? I'm on a roll. Or... it could be argued that I should get off my butt and do something else? Nah. I'm enjoying this completely.

    Wreaths are quickly becoming my "thing". Mainly because, it doesn't require any sewing whatsoever. We all know (or maybe you know) that sewing is my Achilles' heel. Anytime I see a project with sewing, I quickly close the page so I don't get too attached to the project awaiting.

    I've been pinning Christmas wreaths since the beginning of my Pinterest experience, and I've been dying to make one. Here are a few of my favorites I've pinned:

    JoAnn's
    Etsy: Katie Jo Collection
    Real Simple
    Vintage Indie
    Etsy: ItzFitz
    I decided to tackle Itz Fitz's white wreath with poinsettias. It seemed easy enough for a Tuesday night. 
    I picked up a few bouquets of 94 cent bouquets and Wal-Mart with cream yarn and started crafting. 


    Let me tell you, it takes awhile to wrap a wreath. Sure, it's one of the easiest things to do... but darn! It's time consuming. Lucky for me, I had a few conversations on Skype and the telephone to pass the time. So my warning: set aside some QT (quality time) for wrapping your wreath. 

    Welcome!
    After the wrapping shenanigans ended, it took me about 3.5 minutes to hot glue fake flowers on the wreath. Bada-Bing.. Bada-Boom! I was done. In the near future, I'll embark on another wreath adventure (maybe). 

    Now, it wouldn't be a proper post without ending my rambling with a random comment. Well, in case you're unaware.. my beloved Missouri Tigers will be facing the (dirty) kU jayhawks this weekend. Will I be there to cheer on the Tigers? You bet I will!


    My advice: Friends don't let friends move to Lawrence, Kansas.

    Love & Marriage


    Christy Robbins

    Say "I" if you've seen this ornament floating around Pinterest... I!

    When, I pinned this a few months ago I knew that I had to make something similar for my newlywed friends. In October, my sweet friends Emily and Kyle said, "I do" in beautiful Key West, Florida. Then, in November they held the par-tay of the century (also commonly known as a reception) back in Columbia for family and friends (like me! Although, I would argue that I would like to join the family as well).

    Now, it's late November and the Christmas holiday is approaching and it's the PERFECT season to create ornaments. Plus, I have five days off of school.

    Christy Robbins has an excellent step by step guide to making an ornament of your very own. I had full intentions of finding a clear ornament and making a duplicate of the one above. Until Wal-Mart had other plans for the Newlands. Which means, they didn't sell any clear ornaments....

    Yikes - Ignore the price! How tacky of me. 

    I used the following supplies:
    Ornaments
    Wedding Invite
    Scissors
    Pen (or pencil to roll invite)

    I cut the invitation (sorry guys...) into tiny strips and then rolled each strip around the pen. Again, click here to see photos of the step by step process. Then, I stuffed each strip inside the ornament. Luckily for me (and Wal-Mart) the ornament I picked matched their invite and wedding colors.

    Merry & Bright
    Then, I got so excited to show the happy couple their gift I demanded that they drop everything and FaceTime with me. I knew my blog would be published before I saw them next. Don't worry.. they liked it!

    Unrelated, doesn't it look like this reindeer is ready to party? I thought so too.

    Here For the Party!
    Gobble Gobble!

    Sunday, November 20, 2011

    I Get By With a Little Help From My Friends

    I love Thanksgiving for multiple reasons. One of those reasons is Friendsgiving! A delightful tradition that started over five years ago in a college apartment. Needless to say, the 5th Annual Friendsgiving was just as incredible! 

    My contribution to the party was a little potato dish. I was introduced to the "Party Potato" phenomenon a few years ago when a fellow teacher brought in her family recipe to class one day. Since then, I've been having parties with potatoes like it's nobodys business.

    Now, trust me with this recipe and go make your own Party Potatoes!

    What You Need
    1/2 cup melted butter
    1/4 cup chopped onion
    1/2 cup shredded cheese
    1 cup sour cream
    1 can cream of mushroom soup
    2 lbs. Ore-Ida frozen cubed hash browns


    Mix first 5 items together with salt and pepper, combine with frozen potatoes, put in greased 9x13 pan. Top with 2 cups of corn flakes and 1/3 cup melted butter together.Bake at 350°F for 1 hour.


    Now, a family gathering isn't complete without a family photo. Before our delicious feast, we gathered by the fire for a group shot. All we're missing his Clark Griswold. 
    Family Portrait by the Fire
    It also wouldn't be a family gathering without a little arts and crafts time. I rallied the troops back to the table for a pinterest-inspired yummy craft. I had ulterior motives when planning this activity. My 5th graders will be creating this little turkeys on Monday and I did need to practice... but I also wanted to make the treat for fun as well. Uhh... You're welcome! 


    We were good students and followed the directions below. You could say that we had a unique bunch of turkeys. 

    I found this How-To on Examiner. Warning: this isn't as easy as it looks!

    What You Need:

    Oreo cookies
    Candy corn
    Miniature Reese’s Peanut Butter Cup
    Icing
    Candy eyes
    Directions:

    1. Separate the Oreo into two pieces (you may want to use a knife to make sure the cookies stay in tact).
    2. Add icing to the Oreo’s cookie icing and arrange five pieces of candy corn around the top of the Oreo that contains the most icing creating “feathers” and two across the bottom to create “feet” with white tip facing down.  (Note: strategically place feet to prop and hold up the Oreo turkey.  It may take you a few times to get the exact placing.)
    3. Re-close Oreo cookie using icing more icing to attach it if necessary.   
    4. Using icing, attach the Reese’s Peanut Butter Cup with the widest part flat against the bottom of the face of the Oreo. 
    The icing was the best part. Right, Scott?

    Admit it, you love arts and crafts time. 
    Now, back to my favorite Atlanta housewives for some high-quality drama on a Sunday night. Enjoy the short week, teachers!