Explore the Chronicles

Wednesday, June 29, 2011

Crankin' Out Coasters

I have been searching for the perfect coasters to compliment my living room. I can never find any that I like.  Since I'm on this DIY kick nowadays, I suppose I'll make my own! 

Luckily, I found The Coaster Tutorial on The Cottage Home blog and fell in love. 


In order to start this craft, I needed tiles. This meant I had to take a trip to Home Depot. Me and a hardware store is like oil and water. Two things that really don't go together. Imagine a cat trying to swim in the ocean. The few times that I have been to them (alone) I usually wander around aimlessly and ask for help within 3 minutes. Today was no different. I made one lap around the store before I stopped and asked where the tiles were. This was my conversation with the Home Depot worker:

"Excuse me, where can I find tile?" 
"Are you tiling a kitchen?"
"Um.. not exactly..." (ashamed)
"What size do you need?"
I made some awkward movements with my hands and spit out, "small!"
"Take a left and you'll be in the flooring department."

I scurried off ashamed! 

Once I stumbled upon the small pieces of tile that I needed, I was SHOCKED by the price. I literally shouted, "WHOA." Hopefully no one heard me. Although, at this point it was no secret that I was a first timer. Anyway, I loaded up with cream tiles at 13 cents a piece and felt like a champion as I strutted to the check out. 

In order to complete this project, I also had to purchase Mod Podge. It's okay, you can laugh. I laughed at the name of the goo too. Whatever it is.. it's great! 


Once I was home with all my supplies and PODGE (hehe), I riffled through my scrapbook paper and got to work! I made 3 different sets of coasters. I wasn't lying when I said I was cranking out coasters. I made one set with flowers on them. Another set with bright colors and stripes. 

My last set was a special set to replace my poor Harrod's coasters that rest in peace. I purchased them in 2008, but they lived a hard life at the bungalaja (it's a real word, I promise) ... so they haven't really been living a good life. I guess it was either me or the coasters that would survive college. Good thing it was me!

Dry my little coasters... dry!
The set on the right are my special "travel" set! The first coaster is my favorite because of it's London theme. Sorry folks, you won't be receiving this set as a gift!

Ignore my finger. Oops! It's probably hard to do since I brought it up. 

Lastly, I made a special "teachery" (that's a word, too) one for my kitchen.  Cute, eh?


Well, that project was a hoot!

That's all folks! 

Tuesday, June 28, 2011

"Today a reader, tomorrow a leader.”

The best part of being a teacher is that you get to read tons of great books! I may be an "adult" (I use that term loosely here...), but I still enjoy picture books and kid's chapter books. Here are a few books I plan to read as I prepare for 5th grade. Some for fun... some for potential read alouds!

Here Lies the Librarian by Richard Peck

The Mixed Up Files of Mrs. Basil E. Frankweiler by E.L. Konigsburg
This one was highly recommended by two friends, so I would be a fool not to read it!


Mr. Popper's Penguins  by Richard and Florence Atwater
The book is always better than the movie, right?


 Lastly, one of my favorite authors Jerry Spinelli's Maniac Magee


You're never too old for a good book. As Dr. Seuss said, "The more you read, the more things you will know. The more that you learn, the more places you will go."

Monday, June 27, 2011

"I will let you go, Ricky. But first, I want you to say...”I... love... crepes"

Prior to today, I was under the impression that anything you can buy on the side of the street you can make easily in your kitchen. Boy! Was I wrong or what? Honestly, if I can buy a hot dog, taco, or pretzel out of a truck... it can't be too difficult to recreate. Considering I bought a crepe from a truck in Paris, France and ate my delicious treat on the street. (that was a fun rhyme!) I figured I could make this snack at home.
Spoiler alert! I was unsuccessful.
Crazy eyes munching on a carmel crepe in '08

Searching for Quasimoto. I did not find him. 


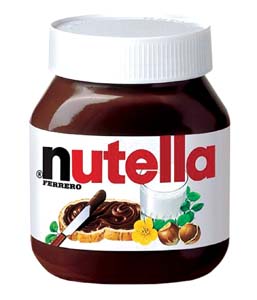
Using inspiration from a recent trip to iHop, Sunday's episode of Real Housewives of New Jersey, and my love of Nutella I embarked on this unforgettable journey.

Whoa whoa whoa, let me back up. Have you had Nutella? If you haven't, stop what you are doing right now and go get some! It's absolutely fantastic. It's not chocolate, it's not vanilla, it's not peanut butter... it's HAZELNUT! My obsession started in London town with my Flat 6 roomies. We liked to put Nutella on everything. Please, you're breaking Nutella's heart. Go get some already!


Using the guidance from All Things Considered blog, I started tackling these crepes. I began mixing the ingredients and things began going smoothly.  I was concerned that the batter was rather juicy, but I thought.."hey! it's a really thin pancake so the batter must be like this..."

As you can see in my picture, I have these neat canisters that hold my sugar, flour, and powdered sugar. At the time, I didn't think anything of it. I just began scooping a white powdery substance into my mixing bowl thinking it was FLOUR. Hours later, I realized it was powdered sugar. No wonder things were not working and my creation looked like this.... TWICE. I even made the batter AGAIN using a different recipe! I made the same mistake twice in a row. Somewhere, Martha Stewart is shaking her head.
I made a big 'ol mess

The ugliest crepe ever made


I could not figure out what was going wrong. I consulted several sites giving me the same recipe. Finally, I gave up on the homemade approach. I was NOT going to give up on my precious Nutella.

I grabbed some tortillas from the fridge and buttered them up. I sprinkled cinnamon and sugar on them and tossed them in the frying pan. After a minute or so I poured Nutella in the middle. (It wasn't this glamorous. My description of this experience is far more exciting) The end product was a delicious Nutella treat. I dare you to try it! C'mon, make Nutella proud!

It's not a burrito.. it's a tortilla filled with Nutella!
After this catastrophe, I needed to experience some success. I had brought a little of France into my apartment (at least I think so...) and next Italy was coming for a visit!

Ever since our family vacation to Italy, my dad has me hooked on caprese salads. It's true! I love the tomato, mozz, and vinaigrette dressing.

gotta love him!

Let Birds Fly has a super simple and yummy recipe for an Apple Caprese Salad. After 2+ hours messing with crepes, I experienced instant gratification with this recipe.


You're probably wondering where the basil leaves are. I am too! I couldn't find them at Hyvee.... can somebody help a sister out? They were M.I.A.

If you're a fan of caprese salad... you'll definitely enjoy this one.

Let Birds Fly photo
As you can imagine, I have quite the mess waiting for me in my kitchen. As Ricky Bobby would say (if you've seen the movie... you'll understand the crepe connection).

Shake and Bake!

Sunday, June 26, 2011

Sunny Sonntag

My vacuum has seen better days. I thought I might give some life to it by changing the belt. One might think that this would be an easy process. FYI: it's not. I bought three different Eureka belts at Wal-Mart and let them sit on the counter for 24 hours. Today, using my tools and the instrucional guide... I tried changing the belt. After what I thought was a successful process, I began to vacuum.


Oops!

My poor vacuum started smoking violently. I shut it off and ran away from it. I couldn't run far because my apartment is small. Instead, I hid it in my kitchen. Hopefully the vacuum fairy shows up quickly to repair my smokey vacuum.

It's craft time. I'm excited about this one, because it was remarkably easy and fun! I was able to successfully watch Beverly Hills 90210 on SoapNet and make flowers from fabric.

This year, I bought a significant amount of fabric to decorate my bulletin boards. Fabric lasts longer than butcher paper, so it may cost more but it's worth it.

I found the perfect tutorial on The Secret Stitch Club's blog. I was super pumped because it didn't require a needle and thread or sewing machine! First, I decided to make a gift for two friends who shall remain nameless at this time. I bought cheap frames at Target to decorate. I gathered my fabric, glue gun, frames, and fancy buttons and starting crafting!


I discovered that the flowers are much better when you cut thicker strips of fabric. Also, the thicker the fabric the better! The online tutorial takes you through each step in making the flowers:

1. Tie a knot at the end of the strip and glue to surface.
2. Twist fabric and glue
3. Repeat!

My flowers at first were quite small but then I figured out the secret to success. 

Up close and personal 

The perfect gift!
Next, I decided to put that one last canvas to good use. I made three more flowers and glued them to the white canvas for wall art. I'm not sure where it will go on my wall, but it's great to have options!


As you can see, I made a boo-boo on the finished product. I originally had a smaller yellow flower, but it didn't quite mesh so I peeled it off. Once I find some, I'm going to add some tulle to hide the sticky glue mess. I highly recommend this craft! It was pretty simple and fun!

That's all folks! 


Friday, June 24, 2011

Stamp Stamp Stamp-a-Roo!

I don't know about you, but I love stamps. I wish I had more uses for them! I am always instantly attracted to them at Hobby Lobby and Michaels. Any chance I could in 2nd grade, I was always stamping things. Sometimes just for fun! 

I found a great project from Oh! Crafts that uses the rubber from pencils as a stamper. Since I'm not very artistic (I can only draw stick people) I knew this was my shot to use a canvas. Maybe I was a tad over zealous with the canvas... but this was an experience. 


Using my pencils and plethora of stamp pads, I started stamping! First I started with a pattern of lines. 

The basics for a beginner like me

I will admit it was difficult stamping on the canvas, because the circles looked grainy because of the bumpy texture. Although, I secretly loved using the canvas! I know Ali Pitt would be very proud of me. 

Next, I was feeling bold and I decided to recreate a heart. Apparently, I have forgotten how difficult it can be to free hand draw a heart. If you think its difficult to draw a heart ... try stamping one with a pencil! It was not a pretty sight.  After I finished, I flipped the heart upside down and it looked better that way! I think I'll save that canvas for something else... I'll spare your eyes that photo. 

Next, I decided to use card stock for my next creation. This was fun because there was no rhyme or reason to my stamping procedure. It turned out bright and colorful and I can't wait to frame it and display the finished product!


Next, I'll think I will try and tackle a shape of some kind. Although I will use a pattern first! This was a fun craft and super easy. It would definitely be a fun craft with little ones, too! 


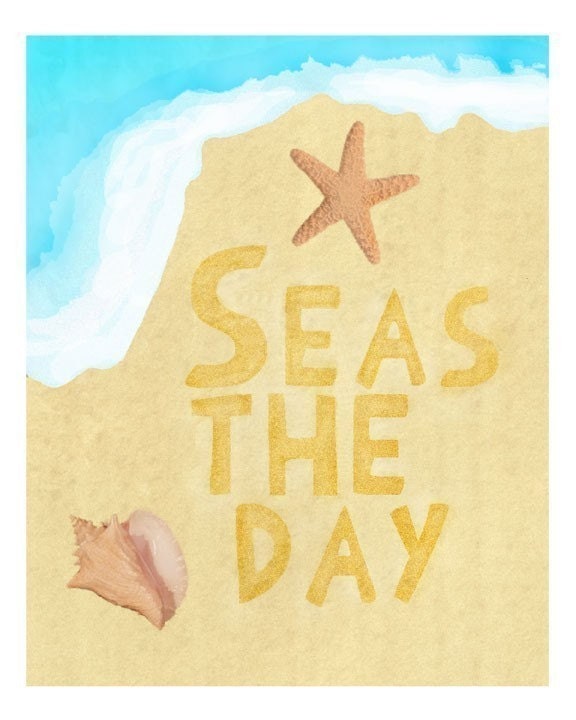
As this cute print from Etsy says, Seas the day! 

Wednesday, June 22, 2011

Fruit Loops are the Key to my Heart


In 2nd grade we talk about having a text-to-self connection with stories we read. This means that when reading you relate personally to a character or event in the story. Well, I had a cupcake-to-self connection with this recipe. I love fruit loops. I love eating them with or without milk at ALL hours of the day. I also love cupcakes. I could eat cupcakes at all hours of the day. Fruit Loop cupcakes screams cupcake-to-self connection!

So, naturally, when I found a recipe on Crepes of Wrath for Fruit Loop cupcakes I thought I had died and gone to heaven. After checking my pulse I decide to test these cupcakes out!


I got out all of my ingredients and set the oven at 375 and realized that I didn't have any milk. The first thought that came to me was, "I'll ask a neighbor!" Then, I quickly remembered that I do not know my neighbors. I checked out the window to see if my one neighbor who waves at me was home... strike two! I contemplated knocking on doors and asking for 1/2 cup of milk and saying it was for my dear old granny's birthday cake (instead of just my Wednesday night activity). Instead of pretending I was the Big Bad Wolf, I decided to head to QT down the street. For the record, my dear old granny would love these cupcakes.


 I think the most fun part of making the cupcakes was "zesting" an orange and a lemon. After I zested all that I could zest, my orange looked rather naked. I made the wise choice of putting it out of its misery and eat it! It was a great decision. 
The recipe said to be GENEROUS with fruit loops on top ... so I did exactly that. 

While I've been putting off my comp day presentation, I've been crafty!

I purchased close to 1,000 (not really) white baskets from Wal-Mart prior to the school year for my classroom library in 2nd grade. Now, my library will be different in 5th grade so I am left with a lot of baskets. I found this organization tip from Oh! Crafts and gave it a whirl. 

Before: a ribbon mess!
After: Alex and my organized ribbons! 


I don't know about you, but I love Scrabble! I have to admit though I have never played with a board and scrabble tiles. Instead I've only played electronically. A few days ago I bought my first Scrabble game ...but I used it for a craft instead. :)


I superglued magnets on the back of the tiles found inside my board game. Now, I can spell fun things on my fridge or use in them in my classroom as fun decor. The possibilites are endless! 


Lastly, I did some shopping on Etsy! I love Parada Creations! Her prints are super cute and will look smashing in my apartment.


Have a loopy and fruity day! 


Tuesday, June 21, 2011

Celebrate!

It's true all I want to do is celebrate! Soon enough I will be celebrating on July 6 when my fellow Fellows and I graduate with our Masters degree!

Until then, I'll keep singing this song:

Saturday, June 18, 2011

Yarn Wrapping is Not for Beginners

Get ready for an explosion of crafting... your eyes might pop out! 

Just kidding.

I spent the afternoon with Alissa crafting up goodies in KC. Let's just say, we got a little frustrated throughout our experience. I'm getting ahead of myself.. let's back up to the beginning.

To start our journey we took a trip to the oh-so-wonderful Hobby Lobby. We managed to find an rustic/antique like frame for the yarn letter project, and a replica of this Vintage Wood Calendar Chalkboard I wanted to purchase from Urban Outfitters. (it was out of stock!)

After Hobby Lobby we headed to Michaels because I had a coupon for 20% my entire purchase! Have I mentioned I'm not very good with coupons? Well, I'm not. In fact, I have a 10% success rate using them. Today made me feel foolish because after I asked about using my teacher discount at the checkout (feeling confident) the woman said, "Your coupon isn't valid until Sunday, m'am."

It appears I cannot read the fine print. Oops! 0/1 on coupons for the day. I was saved by my 15% teacher discount (who cannot read fine print...) That was slightly embarrassing.  Almost as embarrassing as sending an email to 60+ people confusing "too" for "two" in a sentence. Summer vacation has done wonders on me!

Moving right along to craft numero uno. I found the cutest dish towel at Anthropologie while shopping at the Plaza. I decided to display it instead of using it for its intended purpose (being a towel, duh). We found a neat frame and wrapped the towel around the glass so the embroidered knife, fork, and spoon were on display in the golden frame.


Meet Alissa: the hand model 

Here is Finnegan and our finished product! Cute, eh? I think it will look delightful hanging in my kitchen. 

Using inspiration from a craft that Ashley Fine created in her living room, I wanted to try out this so called chalkboard paint people keep raving about. I bought a cheap plastic rim frame and took the cardboard backing out. Then, using my nifty can of chalkboard paint that Alissa found in Michael's...I started spraying. 

"IT'S JUST LIKE SPRAY PAINT!" -my reaction to the paint
"It is spray paint!" -Alissa reassuring me as I painted (good thing I have her around)


The little can there did the trick! Hours later... I am still fascinated. 


After it dried for a few hours, I added a few embellishments to make it fancy. Now, when you come to visit me you can sign your name on my chalkboard and write a little message! It was by far the easiest project of the day.

I've saved the best (and most dreadful) for last. After reading Let Birds Fly blog post on Yarn Wrapped Letters, I was convinced this was the best craft for me. It didn't require any sewing, needles, or manual labor from what the pictures showed. I was hooked! I even left the link open on my desktop for days to build excitement. Maybe I should have kept that little tidbit to myself, but oh well... it's public knowledge now.


Using Let Birds Fly photo and tutorial as a reference, Alissa and I began our journey. We had the frame picked out and I decided on the word "Happy" for these reasons:
1. I like to be happy.
2. I would like for others to be happy.
3. If you're happy and you know it clap your hands.
4. Don't worry be happy.
5. My middle name is Happy (okay I lied, it's Jennifer... but it's close!)

Yarn, letters, and Ben Harper Pandora radio station ready to rolllll

Unfortunately we were not HAPPY while making this project. We started with the individual letters and began wrapping away. The curves, turns, holes, and nonsense of the letters that I chose began to become our crafting Achilles heel. It would have been much easier if we had used block letters. Lesson learned!

Throughout our wrapping experience the following noises were heard by Ali Pitt on the telephone...


"AHHHHHHHHHH"
"STOP IT."
"I'm getting frustrated." -Alissa
"Keep calm and sew on..." -My attempt at humor
"NOOOOO!"


I think you get the idea. It was frustrating! Thankfully, Ben Harper crooning in the background added to our uncomfortable silence due to the wrapping. I started with the letter H and next tackled an A. I realized afterwards that my project was slightly mocking me. As if to say, "HA" you are not done yet, sucker! I can't take credit for the Y... that was all Alissa, although I think that's a memory she will soon forget.


After multiple burns from the glue gun (we cheated) and screeches of frustration, we were able to complete a pretty nifty project! All I ask is that when you come over and see this hanging on my wall you shout with pure joy and enthusiasm by saying, "WOW! I AM SO HAPPY!"

That's all for now. I need to come up with a neat "closing" as we called it in second grade. I'll test out a few before I pick the one for me.

Over and out!
(nahh...)

Friday, June 17, 2011

EEK! Paranoid!

When I was living in London, I started reading books for enjoyment. It was a change from the text books I was used to reading for classes. I quickly fell in love with author, James Patterson. His books are thrilling murder mysteries. I prefer his books featuring Detective Alex Cross and Detective Michael Bennett. I highly recommend any of his books, they are fascinating. I have read them on my iPad, listened to audio versions, and I have many paper copies in my apartment.

Right now, I'm reading one of his more recent books, Worst Case. The only problem is, I can only read it in the daylight (not before bed!) It's definitely a great pick with Michael Bennett solving NYC's latest crime.

More importantly, how does JP have time to write all of these books? I complain about writing a research paper over the course of 13 months, but he cranks out books frequently! He has "something" that I certainly do not have.

http://jamespatterson.com/index.php

What books are YOU reading this summer?

Thursday, June 16, 2011

Whoops! Ran out of glue.

Since I ran out of glue on my latest adventure, I'll share what I did today!

I love doing crafts, but I am limited to certain things because I do not know how to sew. My friend Alissa is my sewing guru and without her I have a craft handicap. Therefore, I was on the search for a fun (easy) craft to get my brain back in craft mode.

I started looking at Martha Stewart's website and found some neat cupcakes to make for Father's Day. Since my family will be taking an outing on the golf course on Sunday... these cupcakes were perfect!

I wish I could say that my cupcakes turned out like Martha's, but we all know I would be lying to you. I will say that I tweaked her flag design by using a toothpick and sticky post-it note. It looks the same to me! I attempted to make one cupcake into a sand trap using a crushed Girl Scout Cookie, but I was unsuccessful. I'll be eating that messy and dreadful cupcake! 

Thanks for the great idea, Martha! Martha Stewart.com

As I mentioned before, I have this craft handicap.  This next craft has been entertaining and quite messy! It makes perfect sense to be included in my first post since I left the kitchen table with yarn glued to my pants. According to some friends, I am the only person who did not make this lovable craft in my pre-k years. So at the ripe age of 22, I have decided to tackle the famous "Glue Yarn Ball". Check out this link for the how-to's like I did!  http://www.makeandtakes.com/glue-yarn-ball-tutorial

Let's just say, I should get a prize for snapping this photo with gluey fingers and yarn on my pants. 

I don't think it was supposed to look like that....

 ONE DOWN! More glue to go, whoops!


For such a simple craft, I've had quite an adventure buying the supplies. Please see my timeline below:
1. I bought balloons at Wal-Mart (assuming I had glue at home because I'm a teacher)
2. Realized I bought the WRONG balloons and I was glue-less
3. Went to Dollar General for more balloons and glue
4. Bought balloons...... but forgot glue (really, what's wrong with me today?)
5. Borrowed glue from Jolyn 
6. Ran out of glue and decided to blog again! 


We can all thank the glue for this great idea.